Eureka Copper Canyon 12 Instrukcja
Oto Eureka Copper Canyon 12 (namiot) instrukcja użytkownika. 2 strony w języku Angielski o wadze 0.3 Mb. Jeśli nie możesz znaleźć odpowiedzi na swoje pytanie Zapytaj naszą społeczność.
Strona 1/2
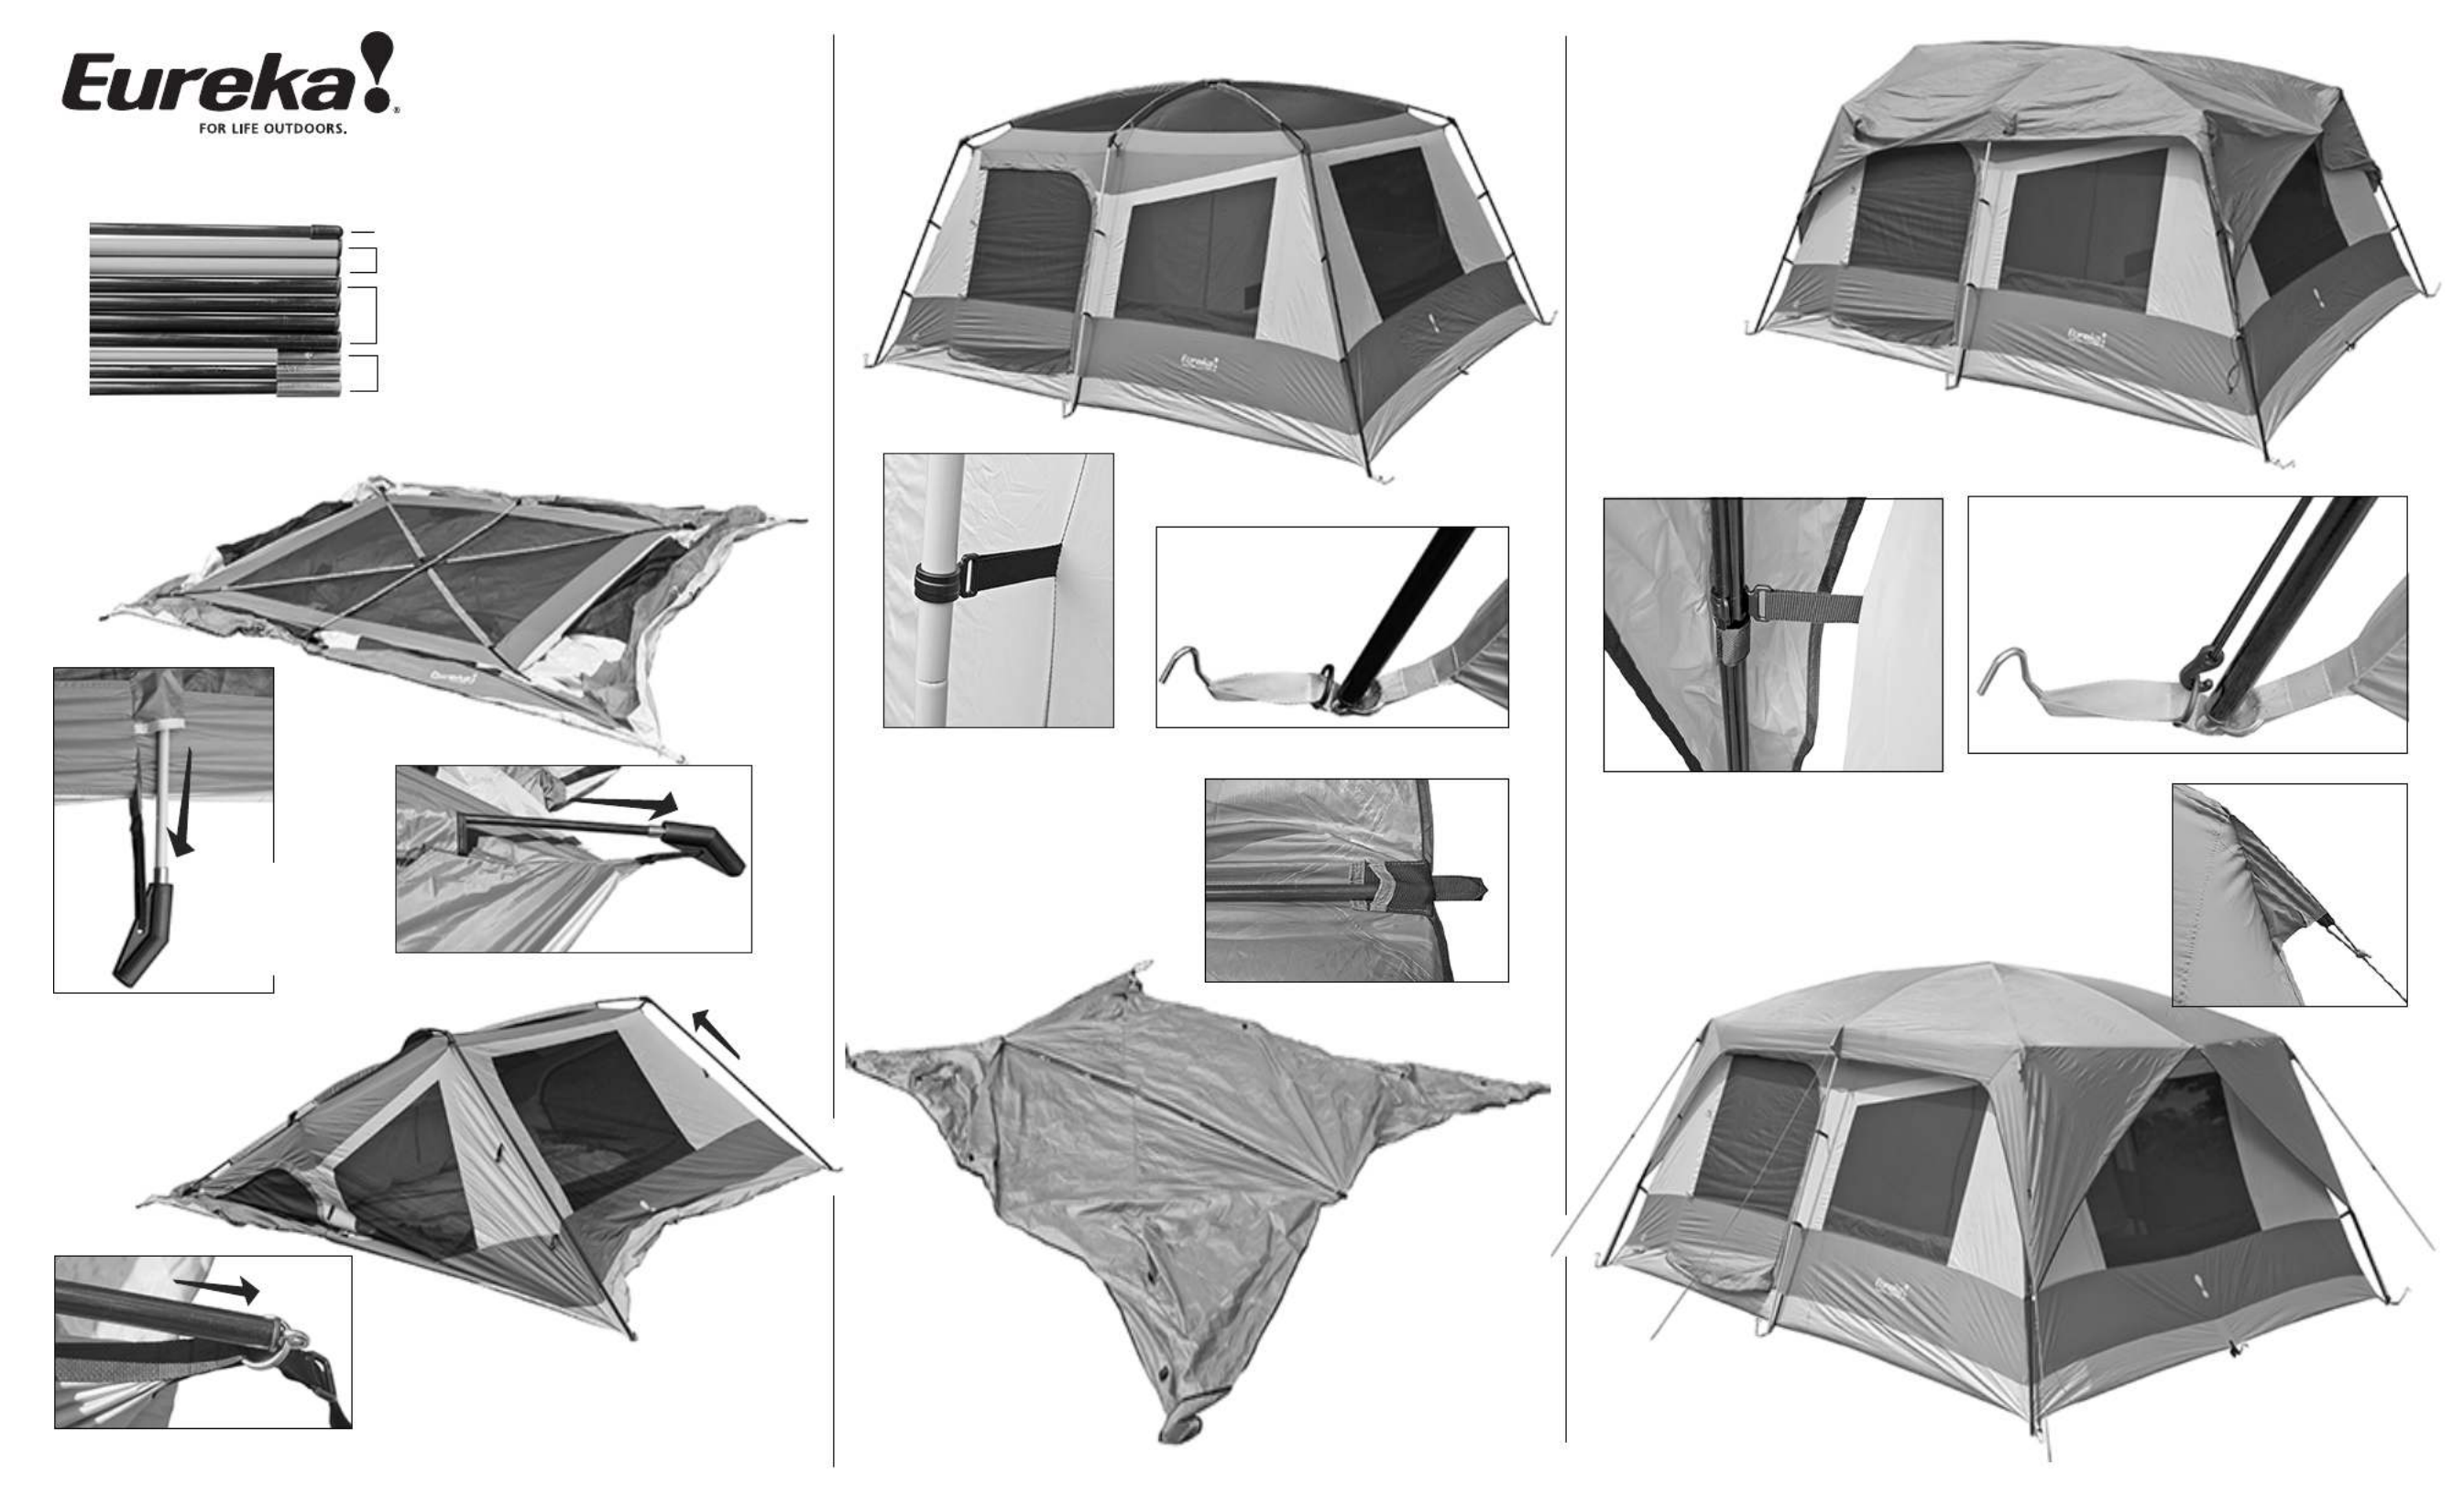
Component List: 1 Tent Body, 6 Wall Poles, 3 Roof Poles, 1 Fly Rod
1 Fly with Guy Ropes, 1 Carry Bag, 1 Stake Bag/Stakes, 1 Pole Bag
This is a large tent;
Set-up is both faster
and easier with two
people.
Spread the tent out with the top side up. Assemble the roof poles and slide the black poles
into black trimmed sleeves diagonally across the roof. Then slide the gray roof pole into
the gray trimmed sleeve
and over the black poles.
Assembly Instructions for
Copper Canyon 12
rev. A 6.2011
Center Wall poles
Fly rod
Corner Wall poles
Roof poles
Insert the gray pole
into the ribbed
section of the
mid elbows. Insert the black poles into the corner elbows.
Raise one side of the roof and
insert the wall poles into the
bottom of the elbows.
Insert the pin from the
web/rings into the
bottom ferrules.
Raise the other side and the center to make a freestanding structure.
Dress out the tent as
you stake the web
loops down.
Attach the J-hooks to the
nylon
rings on the webs.
At the corners, reach under the fly and wrap the
hook & loop straps around the wall poles.
Then wrap the center poles.
Lastly, this a tall, straight sided tent; it is important
that you stake out the guylines at each elbow.
YOUR TENT IS READY !
Clip the tent to the wall poles.
Lay out the fly with the bottom
side up. Assemble and slide the
fly rod into the pockets.
Then wrap the hook & loop tabs
around the rod.
Turn the fly over and drape
it across the tent so that
the yellow webs meet.
Pull the fabric out and over
the corner elbows.
Rozwiązywanie problemów Eureka Copper Canyon 12
Jeśli dokładnie przeczytałeś instrukcję, ale nie znalazłeś rozwiązania swojego problemu, poproś o pomoc innych użytkowników
Specyfikacje
| Marka: | Eureka |
| Kategoria: | namiot |
| Model: | Copper Canyon 12 |